Blog · By The Packaging Vista Team · June 20, 2026
How to Measure Your Product for the Perfect Custom Box
The size of your box decides three things at once. How well the product is guarded. How much you pay to ship it. And how the unboxing feels.
A box that is too big wastes stock and money and lets the product rattle. One that is too tight is hard to pack and can crush the contents. This guide shows how to measure the right way. It covers box sizes, the inner vs outer sizes rule, and how much clearance to allow. And if measuring is not your thing, just send us the product or its sizes. We build a free dieline sized to fit.
Key takeaways
- Measure the product, not a guess: length, width, then height.
- Boxes are sized by inner dimensions: the space your product sits in.
- Add a little clearance: roughly 1/8″–1/4″ for an easy fit, more for inserts or wrap.
- Not sure? Send the product or its size and we build a free dieline.
Why does box size matter?
The right size is not just tidiness. A snug box guards the product, uses less stock, and ships cheaper. Carriers now price by size as well as weight. A right-sized box also unboxes better. The product is shown rather than buried in filler.
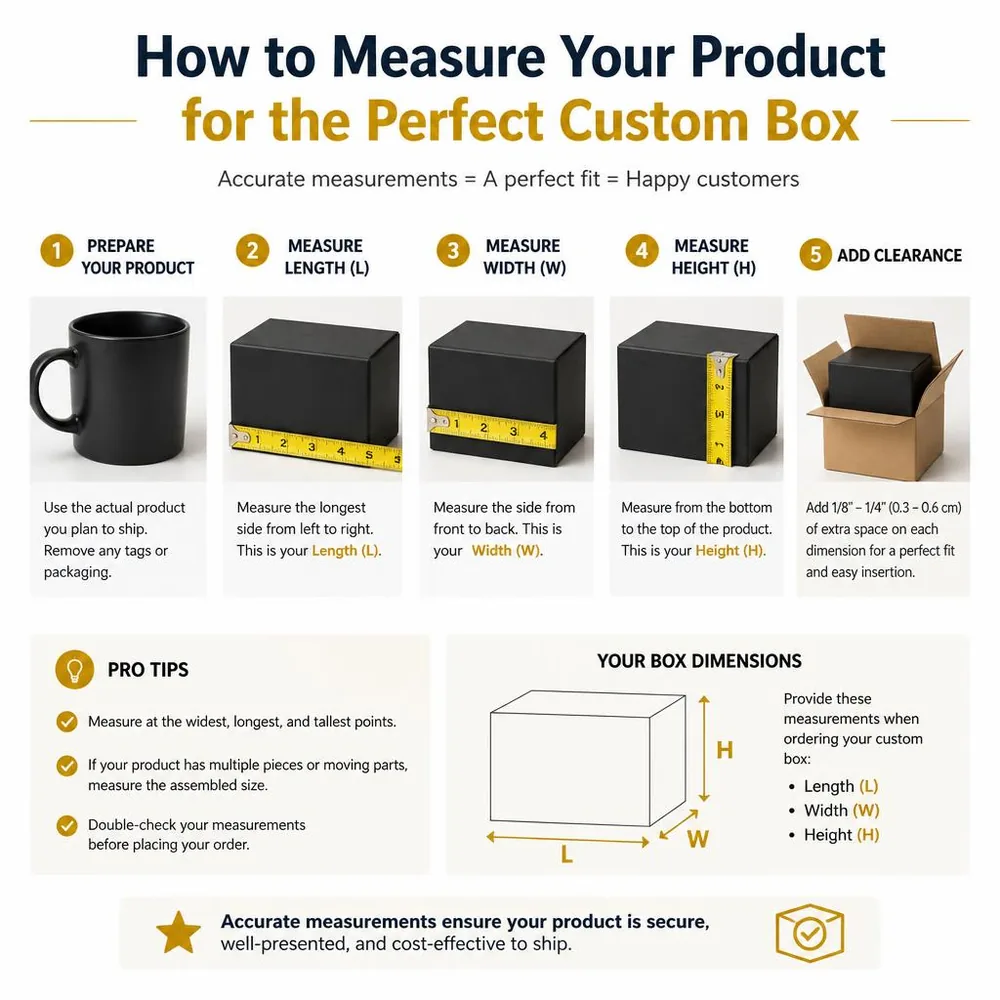
Measuring a product for a custom box, in order:
- Measure length (longest dimension) at the widest point.
- Measure width perpendicular to length, again at widest.
- Measure depth (height) – the shortest of the three.
- Add clearance: 0.25″ snug, 1″ standard, 2″ cushioned.
- Round up to a common size (e.g. 6.3 → 6.5″).
- Note orientation: which face is the printed hero panel.
- Request a dieline at the final measured size.
What are length, width, and height?
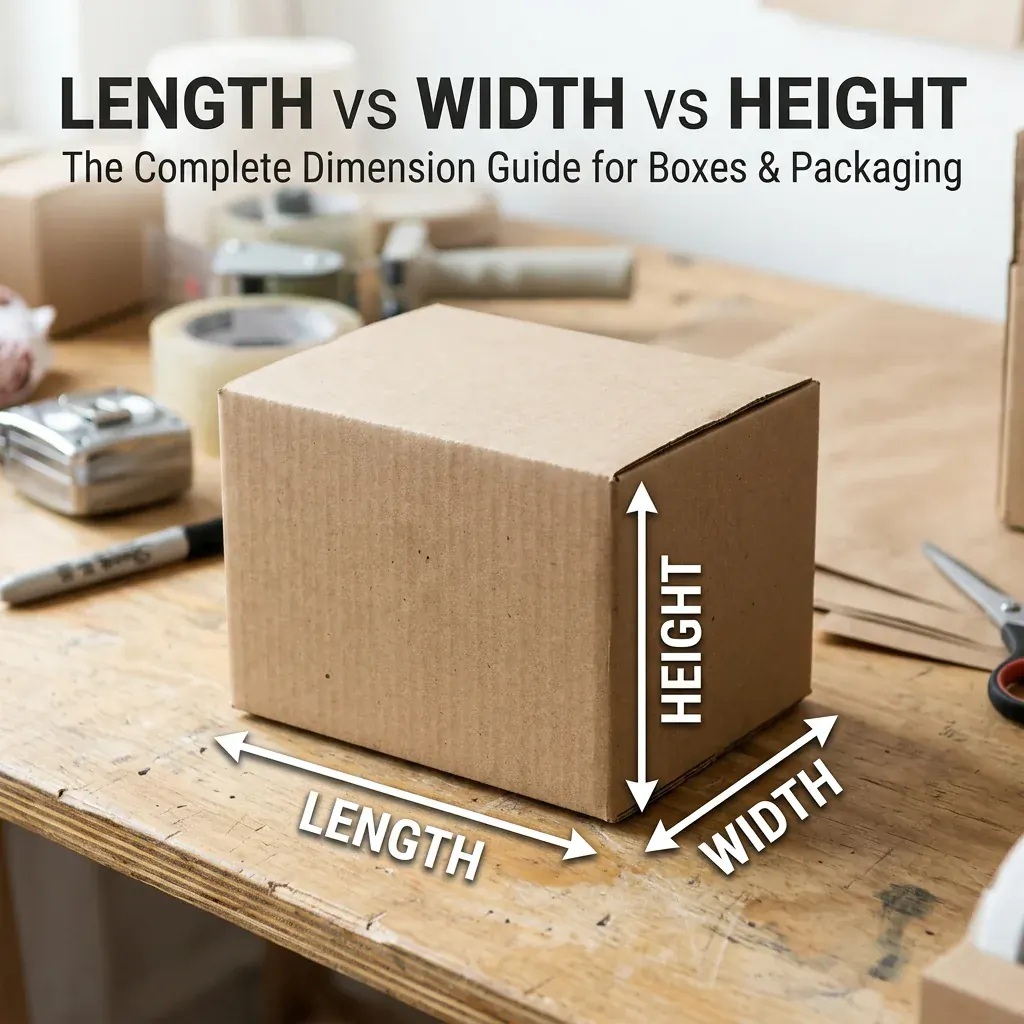
Packaging is measured in a standard order – length, then width, then height (L x W x H):
- Length – the longer side of the box opening.
- Width – the shorter side of the opening.
- Height (depth) – the distance from the opening down to the base.
Measure the product itself at its widest points, and write the numbers in that order so there is no confusion later.
What is the difference between inner and outer sizes?
This is the detail that trips people up. Inner sizes are the usable space inside the box. That is the size your product needs to fit. Outer sizes are the box measured from the outside. That is a bit bigger because of the board thickness.
Custom boxes are normally quoted by their inner sizes. So quote the space your product needs. We handle the board. If a shipping carton has to fit inside another box or on a set shelf, tell us the outer limit too.
It helps to know why that gap between inner and outer size exists. Every board has a real thickness. That thickness sits on all four walls plus the top and bottom. So it is added twice to each of the three sizes.
A folding carton printed on thin paperboard adds only a hair. A corrugated shipper built on thick fluted board can push the outer footprint out by a real amount on every side. The heavier and more protective the board, the larger the outer box grows around the same product.
This is why we ask for the inside space you need, not the outside size of a box you already have. If you hand us an outer measurement and we treat it as inner, the finished box quietly ends up too small once the walls are formed.
The same logic applies in reverse when a box has to live inside a fixed space. Think of a retail shelf, a drawer, a shipping master carton, or a mailer slot. In those cases the outer size is the hard limit. The inner space is whatever is left after the board thickness is subtracted.
Tell us which number is the limit. We work the rest backward from it. So nothing is left to chance. When both the product and the outer space are tight, we flag it early and suggest a thinner board or a different style. Better than letting you find the conflict after we print.
What tools do you need and how do you measure right?
You do not need anything fancy – a steel tape measure or a ruler and a flat surface are enough. The trick is consistency:
- Measure on a flat surface so the product is not tilted or compressed.
- Measure to the widest and tallest points, including caps, lids, handles, or anything that protrudes.
- Use the same unit throughout – inches or millimeters – and note it, so 5 is never mistaken for 5 cm.
- Round up, not down, when a measurement falls between marks, then add your clearance on top.
Write all three numbers down right away in L x W x H order. A single flipped size is the most common cause of a box that arrives the wrong shape.
Once you have the three product numbers, treat them as a starting point, not the final box size. A box that matches the product to the exact fraction is almost impossible to use in the real world.
Cardboard does not flex like a glove. The product has to drop straight in past walls that are already at full height. A hand or a scoop of filler often has to follow it. A touch of clearance turns a rough shove into a clean slide-in.
It also absorbs the tiny quirks in almost every product. A slightly domed lid. A label that adds a fraction. A seam that sits a hair proud. Each on its own is not worth worrying about. But stacked together they are the difference between a box that closes easily and one that bulges.
Clearance is just planned tolerance. Think of it as the margin that keeps a good measurement from becoming a bad box the moment anything varies. A light allowance suits a rigid item that drops in clean. A softer, bulkier, or wrapped product wants more room. So the walls are not forced apart when it settles into place.
You do not need to work this out to the decimal. Give us the true product size and tell us whether it is hard or soft, snug-fit or guard-heavy. We build the right room into the dieline. So the fit feels planned rather than random.
How much clearance and insert room should you allow?
You rarely want the box to match the product exactly – a little room makes packing easy and protects the contents:
- Light clearance (about 1/8″ to 1/4″) for an easy slide-in fit.
- More space if the product is wrapped, bagged, or padded.
- Insert thickness if you are adding dividers or a fitted insert – see our inserts & unboxing guide.
| Product type | Suggested clearance per side | Typical use |
|---|---|---|
| Rigid item, bare (bottle, jar, gadget) | 1/8″ | Easy slide-in fit |
| Rigid item with a label or lid | 1/8″ – 1/4″ | Absorbs label and cap variance |
| Wrapped or bagged product | 1/4″ | Room for tissue or poly wrap |
| Padded, soft, or bulky item | 1/4″ – 3/8″ | Apparel, fabric, plush |
| Product plus a fitted insert | Add insert thickness on each side | Foam or paperboard cradle |
How do you measure odd shapes?
For bottles, jars, and odd-shaped products, measure the widest and tallest points so nothing sticks out. For a cylinder, the width is both the length and the width. When in doubt, measure a bit big. It is easier to snug a dieline in than to find the product does not fit.
Why does a dieline settle the guesswork?
Numbers on a page can still be read two ways. Was that size taken across the widest point or the label panel? Does it include the pump on top of the bottle or stop at the shoulder? Is it the inner space or the outer wall?
A dieline removes that doubt. It turns your sizes into an exact flat blueprint of the box. Every panel, fold, glue tab, and dust flap drawn to scale before anything is cut. When you can see the folded shape and the space it holds, size mistakes that would hide inside a list of three numbers become clear.
You are looking at the real box rather than picturing it. Every custom order here starts with a free dieline. Plus a digital proof and a 3D mockup. So you approve the exact fit on screen before it ever reaches the press.
Inserts and display materials are the piece most people forget to measure. They change the numbers more than you think. A fitted foam or cardboard insert. A set of dividers. A layer of tissue. A wrap of crinkle paper. All take up real space. That space has to be added to the inner sizes, not assumed away.
If you measure only the bare product and then decide to nest it in tissue, the box that fit on paper suddenly will not close. The safest path is to measure the product as it will be shown. Wrapped. Padded. Seated in whatever insert you plan to use.
Or tell us your planned display. Then we can build the insert cavity and the outer walls together as one design. That way the guard, the fit, and the unboxing all line up rather than fighting for the same few fractions of an inch.
What are the common measuring mistakes to avoid?
A few errors come up again and again, and each is easy to dodge once you know it:
- Measuring the old box instead of the product. If the old box was the wrong size, you will just copy the mistake.
- Forgetting clearance. A box cut to the exact product size is nearly impossible to pack.
- Mixing inner and outer dimensions. Decide which you are quoting and stick to it – inner is the default.
- Ignoring protrusions. Lids, pumps, and handles all add to the real footprint.
How does right-sizing save money?
A box built to the product is one of the easiest ways to cut cost and waste at the same time: less material per unit, less void fill, and cheaper shipping. See how size affects price in our packaging cost guide, and how it lowers your footprint in our sustainable packaging guide.
What if you are not sure about the numbers?
You do not have to get this perfect on your own. Send us the product, a sample, or rough dimensions, and our team measures and builds a free, print-ready dieline sized to fit – you approve a digital proof and 3D mockup before anything prints. Learn how that file comes together in our artwork & dieline guide.
Dig deeper: sizing & dimensions guides
For specific sizing questions, see our focused articles:
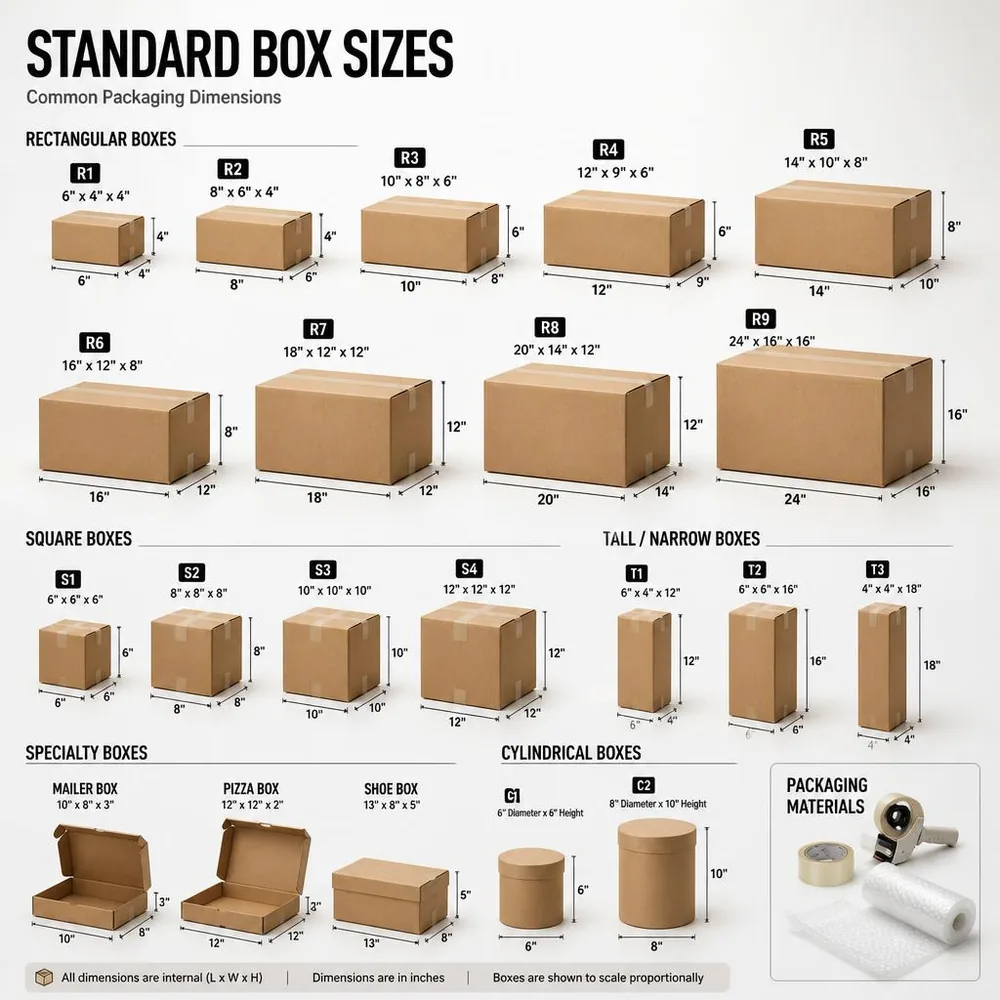
- Standard box sizes – common dimensions by product type.
- Mailer box sizes – picking the right e-commerce size.
- Cake box sizes – a reference for bakeries.
- Dimensional weight – how box size drives shipping cost.
Frequently asked questions
Are custom boxes sized by inner or outer dimensions?
Inner dimensions, by default – the space your product sits in. We account for the material thickness, so quote the inside size you need. Tell us an outer limit only if the box must fit a specific space.
How much extra space should I leave around the product?
About 1/8″ to 1/4″ for an easy fit, and more if the product is wrapped or you are adding an insert. We can advise the right clearance for your item.
In what order do I write box dimensions?
Length x width x height – the longer opening side, the shorter opening side, then the depth. Keeping that order avoids mix-ups.
What if my product is an unusual shape?
Measure its widest and tallest points, or send us a sample or photos with rough sizes. We will design a dieline that fits it.
Why is right-sizing a custom box important?
Because a too-big box wastes material, needs void fill, and blows up dim-weight shipping charges on every parcel you send. A too-small box crushes your product or forces awkward folds. Right-sizing cuts breakage, cuts freight cost, cuts fill cost, and lifts the unbox feel. Over a year of shipments, the savings from a snug fit usually dwarf what a redesigned dieline costs.
How do I choose the right clearance around my product?
About 1/8″ to 1/4″ on each side for a plain product is the everyday rule. Add more if the product is wrapped in tissue, sits in an insert, or ships with accessories. For fragile glass or heavy items, plan cushion space for foam or molded pulp on top of the product clearance. Tell us the product and how it is packed and we call the right clearance on the free dieline.
Which is best: measuring the product yourself or sending it to us?
Either works. Measuring yourself is faster and lets you start on a quote right away – measure length x width x height at the widest points and note any wrapping or insert space. Sending a physical sample is best for odd shapes, tight-tolerance fits, or when you want us to verify a snug custom insert. Either way we return a free dieline and 3D mockup for you to approve before print.
Is a custom-sized box worth it vs a stock size close to your product?
For repeat SKUs and volume shippers – yes. A box sized to the product cuts material, void fill, and dim-weight cost on every parcel. Stock sizes force compromise: oversize costs freight, undersize causes damage. With no die or plate fees at PackagingVista, a custom size costs the same as a stock size at 100+ units. The freight savings usually pay back the redesign within a month or two.
Get a custom box sized to your product
Related reading from OLX Packaging: how to measure a product for custom packaging.
Send us your measurements – or just your product – and we will build a free dieline sized to fit for your custom printed boxes and cartons, with no die or plate fees, a 100-box minimum, and an 8–10 day turnaround. New to packaging? Start with our beginner’s guide, then request your free quote or contact our team.