Blog · By The Packaging Vista Team · June 20, 2026
Custom Packaging for Beginners: A Simple Start-to-Finish Guide
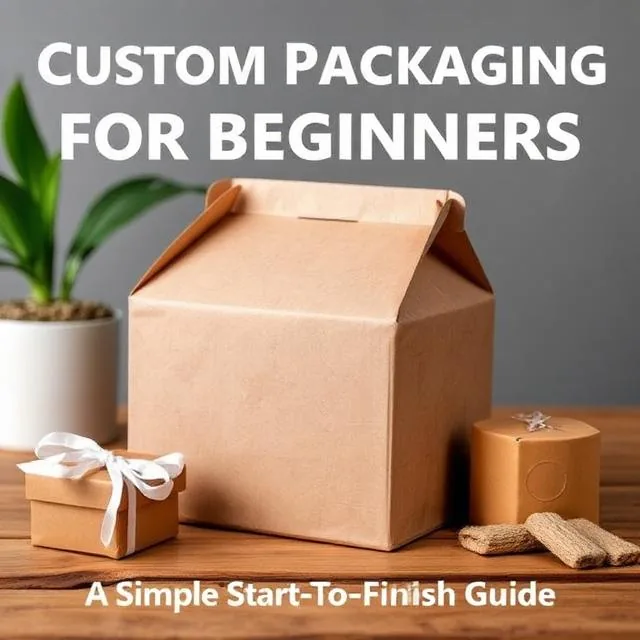
Custom packaging is a box made for your specific product and printed with your brand, instead of a plain stock box. If you are launching a product or moving up from generic boxes, the choices can feel like a lot – but they are not, once you break them down.
This beginner’s guide walks you through the basics in plain language, with links to dig deeper on each step. When you are ready, you can get a free quote in about a day.
Most first-time buyers share the same worry: that printed boxes will be pricey, complex, and full of jargon they should already know. They are not. The whole process is a short set of plain-English choices, and the supplier does the technical work for you.
By the end of this guide you will know what custom packaging is, why it beats a blank box, the four choices you make, how a box gets made, and what it costs. You do not need a design background, a warehouse, or a big budget. You just need to know your product and who buys it.
| Style | Best for | Typical stock |
|---|---|---|
| Reverse tuck-end | Cosmetics, supplements, single SKUs | SBS 14–18 pt |
| Mailer (roll-end tuck) | DTC subscription, apparel, small tech | E-flute corrugated |
| Two-piece / sleeve-and-tray | Beauty compacts, cushions, palettes | SBS 18–24 pt |
| Rigid setup box | Prestige gifts, kits, PR mailers | 2–3 mm greyboard, wrap |
| Window box | Bakery, bath bombs, candles | SBS with PET window |
| Gable-top | Bakery to-go, party favors | Kraft or SBS grease-resistant |
What is custom packaging?
Custom packaging is a box (or wrap, or insert) built to your product’s size and printed with your brand – your logo, colors, and message. “Custom” just means it is made for you, not pulled off a shelf. It can be a simple printed carton, a foil-stamped rigid gift box, or anything in between.
The key feature is fit. A custom box matches your product, so nothing rattles, no filler is needed, and no shipping space is wasted.
Compare that to the alternative. A stock box is a generic size that a supplier keeps in a warehouse and sells to everyone. Since it is not built for your product, you pick the nearest size that is a bit too big. Then you fill the gap with paper, bubble wrap, or air pillows so the contents do not shift.
That extra fill costs money, adds weight, and looks cheap. Custom packaging fixes all three at once. The box fits the product, so it uses less material, ships lighter, and looks intentional the moment it arrives. Custom does not have to be fancy. A plain kraft carton with a one-color logo is still custom, and for many small brands that clean look is just right.
Why does custom packaging matter?
A good box does three jobs at once:
- It protects your product on the way to the customer.
- It sells by standing out on a shelf and looking professional.
- It builds trust, because branded packaging signals a real, established business.
For an online brand, the box is often the first physical thing a customer touches. So it is part of the experience, not just a container. A plain brown box says nothing about you. A branded one tells the customer they bought from a real brand that cares about details. That impression carries into reviews, repeat orders, and the photos customers share.
There is a business case under the emotional one. Packaging is a marketing surface you have already paid for. Every order ships in something, so printing your brand on that something costs little extra but pays back long after the sale. It earns free unboxing photos and videos from customers.
It makes a small brand look real enough to trust with a second order. And on a crowded shelf, it can be the reason a shopper picks up your product instead of the one next to it. None of this needs a big budget. A modest, well-fitted, cleanly printed box beats a fancy product in an afterthought wrap, because the packaging is where a buyer forms a first take on your care and quality.
How custom packaging balances product protection and product branding
Every custom box does two jobs at once. Product protection keeps the item safe on its journey to the buyer, and product branding tells that buyer who made it and why to trust them. Get the balance right and the same box handles both without compromise or added cost.
Protection comes from the material, the fit, and any inserts. A snug inner size stops rattle and drop damage; the right board weight matches the load – paperboard for light retail items, corrugated for heavier or fragile ones, rigid for premium gifts.
Branding comes from custom printing on the outside – logo, colors, and typography carried through in offset, digital, or flexo inks depending on run size and finish. Neither job costs more than the other. They print together on the same sheet in a single custom printing run, so a well-designed box protects the product and sells the brand in one production step.
Retail packaging vs e-commerce packaging: what changes?
Where the box will live shapes the whole spec. Retail packaging sits on a shelf and competes for eye contact – printed folding cartons, window cutouts, and shelf-ready displays win the pickup. E-commerce packaging ships through carriers to a doorstep, so the box itself is the storefront moment.
Mailers, corrugated shippers, and branded interior prints matter more than shelf pop. Many brands need both: a folding carton for stores and a shipping packaging outer for online orders.
| Channel | Best box type | Design priority |
|---|---|---|
| Retail shelf | Folding carton, tuck-end, window box | Shelf pop, mandatory panels, barcode |
| Direct-to-consumer (DTC) | Mailer, corrugated shipper | Unboxing moment, brand printing inside & out |
| Wholesale / B2B | Bulk corrugated shipping packaging | Stack strength, clear labeling |
| Gift / premium | Rigid setup, magnetic close | Feel, finish, keepsake value |
What are the four decisions you’ll make?
Almost every packaging project comes down to four choices. You do not have to get them perfect – we will help – but here is what each one means:
- Box style. The structure: a mailer for shipping, a folding carton for shelves, a rigid box for a premium feel. Our box styles guide explains them.
- Material. Cardstock, kraft, corrugated, or rigid board. Greener options like recycled stock are covered in our sustainable packaging guide.
- Printing. Your artwork in full color, with exact brand-color (Pantone) matching available.
- Finish. The surface feel – matte, gloss, soft-touch, foil, and more, explained in our box finishes guide.
How do you choose a box style?
Style is the decision beginners worry about most, but it usually answers itself once you know how the product sells. If you ship direct to customers, a sturdy self-locking mailer box is the workhorse – sturdy, self-locking, and great for unboxing.
If your product sits on a retail shelf, a printed folding carton or economical printed tuck-end box is light and economical. And if you want a premium, gift-like feel, a premium gift-like rigid box delivers it. When in doubt, tell us how and where you sell and we will recommend the right structure.
How do you choose a packaging material?
Material decides how the box feels and how much it protects. Cardstock (paperboard) is smooth and ideal for printed retail cartons. Kraft is the natural, recyclable brown stock favored by eco and artisan brands. Corrugated has a fluted inner layer for strength and is what most shipping boxes are made from.
Rigid chipboard is the thick, premium board behind gift boxes. Our packaging materials guide compares them side by side so you can match the stock to your product and budget.
A simple way to choose is to think about weight and journey. Light product for a shelf or a mailer? A printed paperboard carton is plenty. Heavier, fragile, or shipping on its own? Corrugated gives you the crush resistance to survive the trip. A gift or a luxury item the customer will keep?
Rigid board signals that value the moment they lift the lid. Thickness matters too. It is measured in points or by corrugated flute grade, but you do not need to memorize that. Just describe your product and how it ships, and we will pick a stock strong enough for the job – without paying for more board than you need.
How do you get the box size right?
Size is the most important detail on the whole order, and it is also the one beginners get wrong most often. A box even a quarter-inch too small will not close cleanly. One that is too large lets the product slide, invites damage, and wastes shipping.
The rule is simple. Measure the actual product, not the box you imagine around it. Measure it in three dimensions – length, width, and height – at its widest points. If your item is an odd shape, measure the smallest rectangle it fits inside.
Add a small allowance if the product is soft or needs an insert. Note whether anything else ships in the same box, such as a card, a sample, or tissue, because those take up room too.
You do not have to nail the final size on your own. The safest path for a first order is to tell us the product and, if you can, send one to us or share clear photos with a ruler for scale. From there, our team confirms the internal size, allows for board thickness, and builds the box around the product – not the other way around.
If you want to work it out yourself first, our how to measure for a custom box guide shows where to place the tape and how much clearance to leave.
How is a custom box made?
The process is straightforward, and we handle the technical parts:
- Quote. You tell us the product, size, quantity, and finish; we send a price.
- Design & dieline. Our team builds a free print-ready dieline around your artwork.
- Proof. You review a digital proof and 3D mockup, and approve it.
- Print & ship. We produce your boxes in 8–10 business days and ship them to you.
You only need to supply your product details and a logo. We take it from there. A dieline is just the flat blueprint of your box, with every cut and fold marked. If you want to see how one works, our dieline templates guide shows the cut, fold, and bleed lines.
How much does custom packaging cost?
Cost depends on size, material, quantity, printing, and finish, so packaging is priced by quote. The good news for beginners: there are no die, plate, or setup fees here, and the minimum is just 100 boxes – so a first run stays affordable. Our packaging cost guide breaks it all down, and our cost-reduction guide shows where you can trim without cutting quality.
Two ideas explain most of what you will see on a quote. First, the per-box price falls as quantity rises. The fixed cost of setting up a print run gets spread across more units, so 500 boxes usually cost less per box than 100 – even though the total is higher.
Second, setup fees, where they exist, hit small orders hardest. Many suppliers charge extra for the cutting die and the printing plates, and those one-time tooling costs can double the price of a small first run. We do not charge die, plate, or setup fees, and we hold the minimum at 100 boxes.
That lets a beginner order a real, on-brand test run without a big bet. You put real boxes in front of real customers, learn what works, and reorder or adjust – instead of over-ordering to justify the tooling. When you compare quotes, look past the headline price.
Check for setup charges, plate fees, or high minimums hiding in the fine print.
Which packaging fits your industry?
Different products have different needs – food has to be food-safe, CBD has labeling rules, beauty leans premium. We have a short guide for each: CBD, cosmetics, food & beverage, and retail & e-commerce. Or start with the overview in our packaging by industry guide.
How do you prepare artwork for a printed box?
Artwork worries stop a lot of beginners before they start, but the bar is lower than you think. If you have a logo, brand colors, and a rough idea of what you want on each panel, that is enough to begin. The design team fills in the rest and fits it to the box.
The one thing that really matters is resolution. A logo pulled from a website or social profile is usually too small. It will look soft or pixelated once it is printed at full size. A vector file – the kind a designer can scale without it blurring – is always the safest starting point.
If all you have is a low-resolution image, tell us. We can often clean it up or redraw it.
Color is the other place first-timers get surprised. Screens glow and paper does not, so a color can look a bit different in print than on your monitor. If your brand lives or dies by an exact shade, ask for Pantone (spot-color) matching. It locks the ink to a specific reference instead of mixing it from the standard print inks.
Before anything is printed you will see a digital proof, and often a 3D mockup, showing how the artwork sits on the finished box. Nothing goes to press until you approve that proof. That is your checkpoint to catch a typo, a misplaced logo, or a color you want to change.
If you want to prepare files yourself, our artwork & dieline guide covers bleed, safe zones, and file formats in detail.
What are the most common beginner mistakes?
- Guessing the box size. Measure your actual product first – see how to measure for a custom box.
- Sending low-resolution art. Logos should be vector where possible so they print crisp at any size.
- Over-ordering on a first run. Start at the 100-box minimum, confirm the fit and look, then scale.
- Adding too many finishes. One hero finish usually looks more premium than several.
Frequently asked questions
Do I need a designer to order custom packaging?
No. Free design support comes with every order. If you have a logo and an idea, our team builds the print-ready file for you, and our artwork & dieline guide covers file setup if you want to prepare your own.
What is the smallest order I can place?
Just 100 boxes, with no die or setup fees – ideal for a first run or a test before you scale up.
How long does it take?
Standard production is 8–10 business days after you approve the proof, plus shipping time.
What files do you need from me?
Print-ready vector art is ideal, but a logo and a description of your product are enough to start – we will tell you exactly what we need.
Can I get a sample before ordering the full run?
You will always see a digital proof and a 3D mockup before production. You can confirm the size, layout, and colors on screen before you commit. That approval step is your safeguard against a warehouse of boxes in the wrong size or shade. It costs you nothing but a few minutes of review.
What if I do not know which box style I need?
That is the most common starting point, and it is not a problem. Tell us what the product is, how it is sold, and how it reaches the customer. We will recommend a structure – a shipping mailer, a shelf-ready carton, or a rigid gift box – that fits both the product and your budget.
Will my printed colors match my brand exactly?
They can. Standard full-color printing gets close, and for an exact brand shade you can request Pantone matching, which pins the ink to a specific reference. The proof you approve shows you the result before anything goes to press.
How do I choose the right box style as a beginner?
Answer four questions: What is the product? How does it ship (self, retail, DTC)? How fragile is it? What is my budget? For light retail items pick a tuck-end folding carton. For DTC shipping pick a printed mailer. For gift or premium items pick a rigid or magnetic box.
For odd shapes pick a die-cut. When in doubt tell us the product and we recommend on the free mockup – that is what most beginners do and it costs nothing.
What are the benefits of custom packaging vs stock generic boxes?
Perfect fit to your product (no rattle or slack that reads cheap), brand identity printed on the box rather than a sticker that peels, mandatory panels (facts, warnings, barcodes) laid out with room to breathe, and a shelf or unboxing presence that stock brown boxes never deliver.
At our 100-box minimum with no die or plate fees, custom sizing costs the same as stock and fits far better. There is rarely a good reason to compromise on generic packaging once you cross 100 units.
What is the difference between custom packaging and personalized packaging?
Custom packaging is one designed box built to your brand and product specs – every unit in the run is identical. Personalized packaging goes one step further – each unit or short batch varies (name, season, region, campaign). Both use the same base dieline. Most beginner brands start with custom, then explore personalized editions for holidays or influencer seeding once the base pack is dialed in.
Which packaging supplier features matter most for a beginner?
Four to check: no die/plate/setup fees (biggest hidden cost on small runs); low minimum (100 is realistic; anything above 500 forces overordering); free design help and dieline (beginners rarely have vector art ready); and short fast turnaround (overseas 6-10 week waits kill iteration).
Ask any supplier for an all-in quote including any one-time charges – a low per-box price with heavy tooling fees costs more than a fair per-box price with none.
Is custom packaging worth it for a very small brand at 100 units?
Yes for almost any brand selling to end consumers – and no for pure B2B fulfillment where the box is opened once by a warehouse. At 100 units with no die or plate fees, a custom-fit branded box costs surprisingly little and pays back through better unboxing, less product damage, and a professional shelf or porch presence.
A sticker on a stock brown box reads amateur; a printed carton reads like a real business. That perception difference drives repeat orders.
Related reading from OLX Packaging: product packaging 101.
Custom packaging is easier than it looks, and you do not have to figure it out alone. Tell us your product, its size, and the look you want. We will send options and a quote with no die or plate fees, free design, and a 100-box minimum. Browse custom boxes for any product, then request your free quote or contact our team to get started.